Showing posts with label Healthy. Show all posts

Sunday, October 4, 2015

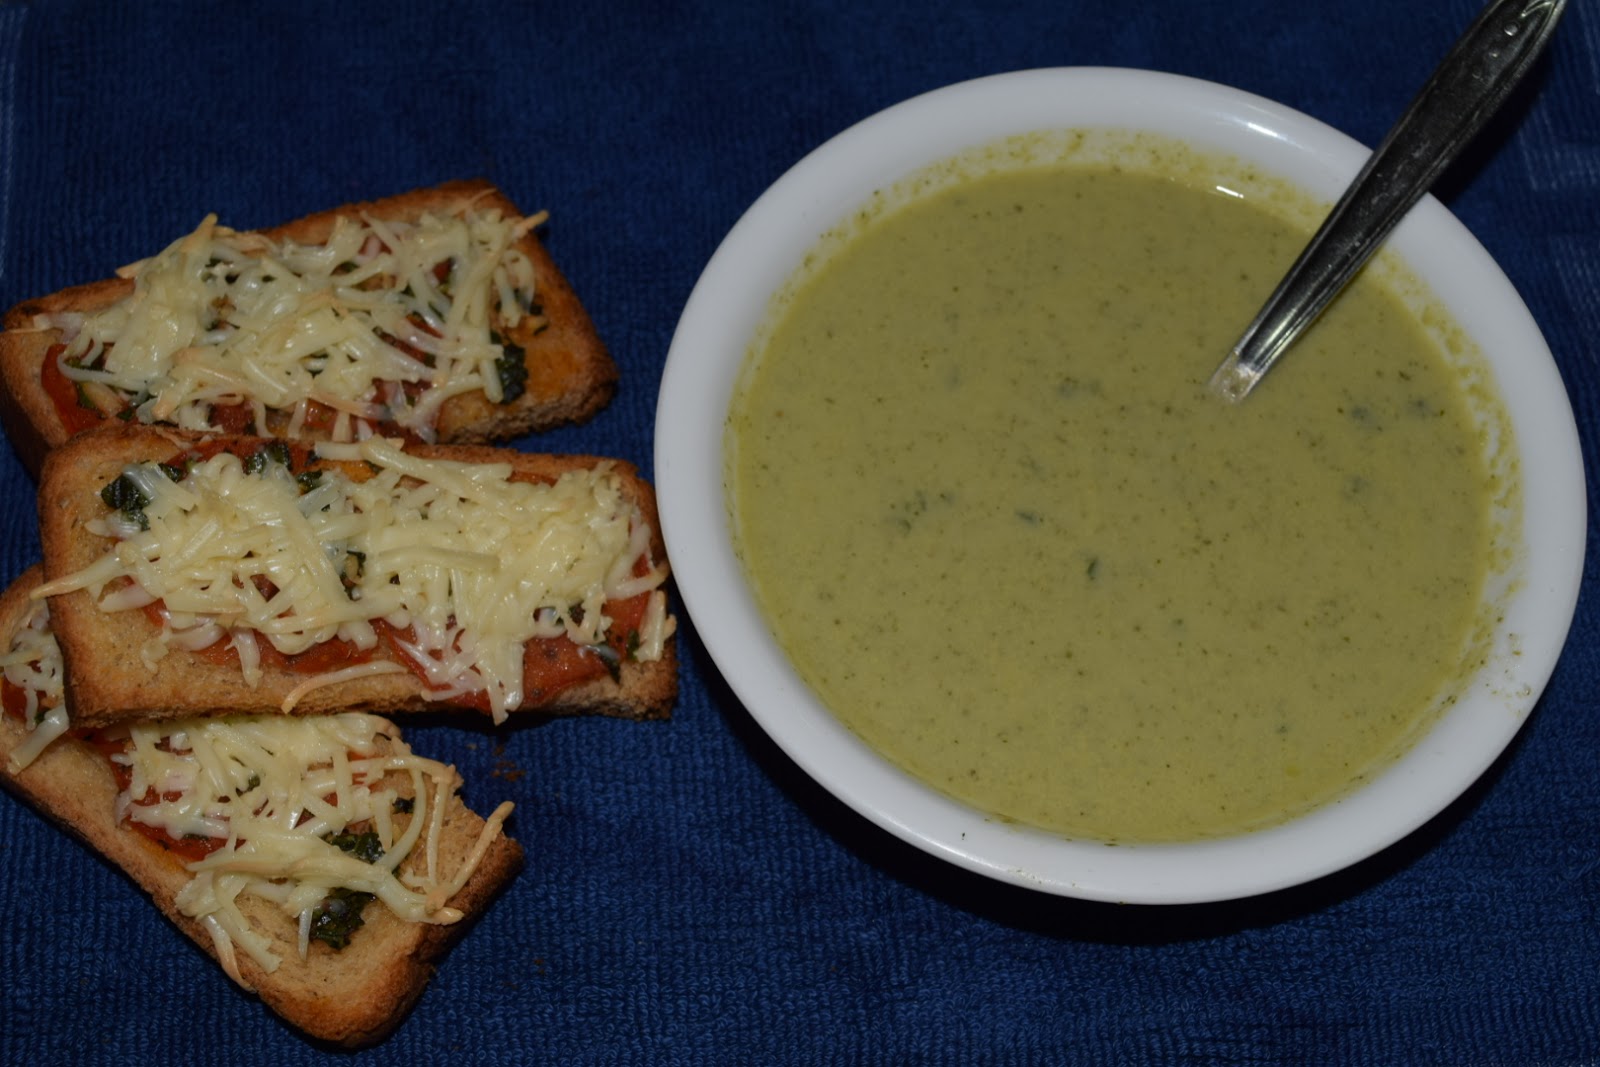
Cream of Celery Soup


Packed with flavours and comfort. Perfect when you are sick. Lifts you up instantly.

Serves: 4
Cooking Time: 20 mins
Preparation Time: 10 mins

Ingredients:
1.5 cup  Chopped Celery with  leaves
1/2 cup Finely chopped onions
4-5 cloves garlic, chopped or crushed
1 tbsp Whole wheat flour
1 cup Milk
1 tsp oil
1 tbsp butter
1.5 cup Veg Stock/water
Salt and freshly ground black peppercorns as per taste

For The Garnish
Finely chopped celery - 2 tbsp.

Method:
1.Heat the oil, add the onions & garlic, sauté for 1 to 2 min.
2.Add the celery and sauté for 2 min.
3.Add 1.5 cups of water/stock and boil on a medium flame for 10 mins.
4.Then blend it to a purée.
5. In another pan, add butter,  once melted, add whole wheat flour, then the milk, once the white sauce thickens, mix it with purée.
6.Add salt and pepper, a tsp nutmeg (jaiphal) & mix well and cook for 2 to 3 minutes, add the chopped celery. Serve.


Friday, October 10, 2014

Mexican-Style Corn Soup


After a long absence, I am back with a soup! Winter's around the corner and soup lovers just need a reason to have one!

This is mexican inspired corn soup. Chunky, simple, quick and comforting! Two bowls of it for a light dinner!!

Also, its healthy as it doesn't involve any overcooking. To summarise, its a one pot soup, great for all ages!


Serves: 4 Preparation Time: 10 mins Cooking Time:15mins

Ingredients:

¼ cup spring onion, diced (or regular onion)
1 tbsp garlic, crushed
½ cup Red bellpepper, diced
½ cup Green bellpepper, diced
¼ cup Yellow bellpepper, diced
½ cup corn, boiled
1 medium sized tomato, diced (blanched, preferably)
2 tbsp olive oil
2-3 tbsp Taco-seasoning powder
salt, red chilli powder as required
a pinch of sugar
water/stock as required

For Garnish:

2 tbsp spring onion greens, chopped (optional)
2 tbsp cheddar cheese, grated
some crushed tortillas

Method:

1. In a deep pan, heat some olive oil, sauté onions and garlic.

2. Just when they turn translucent, add in the bellpeppers and some salt. Cover & cook for about 2 minutes.


3. Now add in the tomatoes, and corn. Some more salt and cover and cook for 5 minutes.

4. The vegetables should lose their firmness by now. To this, add the taco seasoning (2 tbsp), chilli powder, sugar. Toss it well.

5. Add water/stock upto an inch above the veggies or as per the consistency you prefer. Mix well, cover and let it cook for 7-8 mins.

6. Check for taste and add more of the taco seasoning mix if required and its ready!

7. Garnish with spring onion greens in the soup pot. While serving, garnish with cheese and crushed tortillas.


Enjoy this comforting soup by itself or with some garlic bread!


Tuesday, July 9, 2013

Thai Chilli Cakes

Thai Starters.. They don't  have that! Its soup usually that they begin with! So I had to look for something that's Thai and could be made into starters. So began the internet surfing for this. Spring Rolls is overdone. I wanted something new. And then, I came across Thai Chilli Cakes by Sanjeev Kapoor. Something innovative, easy and healthy too! I knew I had to try this.

Its a mixture of bengal gram (chana dal), chickpeas (kabuli chana / choley) and to give it the thai touch, the Thai Red Curry Paste. Its really simple. Its such a change from using potatoes is most of the tikki type starters that this recipe is a must try. Plus its shallow fried!

This recipe is adapted from here. I have followed it almost entirely with just a few optional changes. Its a protein rich recipe and can be made even otherwise as a snack or a tikki to make kathi rolls, wraps, burgers, or sandwich!! Great for kids and a healthy option for dieters.

So here it goes:

Serves: 6 Preparation Time: 15 mins Cooking Time: 10 mins

Ingredients:

To be soaked overnight, boiled with salt and drained:
1 cup Chickpeas (kabuli chana / choley)
½ cup Bengal Gram (chana dal) 

Other Ingredients:
3 tbsp Thai Red Curry Paste
8-10 coriander stalks, cleaned and roughly cut
1 cup onions, finely chopped
2 tbsp coriander, chopped
1 tbsp lemon juice
Salt as per taste
Oil for shallow frying, as required

Dipping Sauce:
Thai Sweet Chilli Sauce
Ketchup

Method:


1. In a mixer/ food processor/ grinder, take the coriander stalks and crush them into a paste. If required, add some bengal gram to it so it gets crushed well.

2. Once the stalks are crushed, add the chickpeas and balance bengal gram and crush.

Do not use any water to while crushing.

3. It should now resemble a largely smooth & moist dough. Add in the onions, coriander leaves, salt, curry paste, lemon juice and salt. Mix well.

4. Roll them out into even sized flattened balls/tikkis.

5. In a pan, put 3-4 tbsp of oil or as required. Let it heat and then place all the tikkis and shallow fry them on each side.

And its ready! Serve hot with the thai chilli sauce or ketchup!
Its that simple! Enjoy!

Notes & Tips:

1. Unlike the original recipe, I boiled and used the bengal gram, perhaps that gave a slightly loose texture to my mixture. I used about 2 tbsp of breadcrumbs. My mom felt it was loose but I felt it was alright! It cooked and tasted just the same without the bread crumbs. So you can go with your preference.

2. The quantity of curry paste will depend on the potency of it.

3. You can also crush some kaffir lime leaves with the coriander stalk to make it more thai.

4. If you are using it as a tikki, you can add some mint/phudina leaves instead of kaffir lime leaves. Serve it with coriander chutney. Alternatively, if using it in a wrap or a roll or for burgers, just get creative and use it!

5. For Jains:
Just omit the onions. And the rest is same.
A very simple protein rich jain option!

If you try it, do leave your experiences in the comment section! And ofcourse, for any queries too!

Enjoy!

Thursday, July 4, 2013

Tom Kha Soup

Its been a few months having posted. I started working full time which has kept me too busy with no time for cooking or blogging!

So recently, I got the opportunity to cook for a family dinner. They wanted to try the Thai food I make.
I was dying to cook something and this was for a group of 15 people so I was all geared up for this and somehow managed to cook it all despite a busy work schedule.

The menu in Thai was Tom Kha soup, Thai chilli cakes, Corn Cheese Balls (not Thai), Pad Thai Noodles, Thai Red Curry, Fragrant Rice. I also tried to make a panna cotta using china grass which turned out to be a dud because it just refused to set! Though the spiced peach sauce I made along was a hit!

Too much of Tom-yum and honestly its just a thai version of clear soup. So this time, the experimental bug in me wanted to try cooking something new. I have been to Thailand and while I was in bangkok, a dear local friend took me to a Thai vegetarian restaurant and made me taste a vegetarian Tom -Kha, the taste of which still lingers at the name! So I thought let me try this. Its predominant flavour is lemon grass & ginger with mild flavour of coconut milk. The lemony tangy bit will be appreciated on Indian palate!
And with the monsoon setting in, this soup will warm you up and keep the colds and flues at bay!

I went through a lot of recipes, mostly non-veg and finally came up with my own version of this recipe.
Traditionally, its made with chicken, shrimps or other thai seafood. Tom-kha mean chicken galangal. I was skeptical about the pieces of galangal being appreciated in the soup so instead I crushed them in the red curry paste. I tried to make it more textural and flavoursome in the vegetarian version.

I had to make it keeping the diet restrictions of my guests in mind. But my recipe will give you the authentic version of making it. You can then move around with your diet restrictions.

This is low calorie and low fat soup!! So all you guys on a diet can try too!!

So here we go:

Unfortunately, I couldn't take pictures as I was too busy cooking and then serving! I'll update it when I make it again!

Serves: 4 Preparation Time: 15 mins Cooking Time: 15 mins

Ingredients:

2 tbsp Thai Red Curry Paste
1 cup of vegetables, diced (onions, green cabbage, broccoli, cauliflower, carrots, babycorn)
2-3 tbsp of mushrooms, sliced (button, oyster, porcini, enoki)
½" galangal, sliced (optional)
½" ginger sliced
1 small tomato, diced
1 stalk lemon grass, diagonally sliced (optional)
1 tbsp lemon juice
½ cup coconut milk
¾ cup lemon grass extract*
2 cups vegetable stock or water
Salt as per taste
1 tbsp oil (optional)

 To be tied into a bouquet garni:
5-7 coriander stalks
4-5 basil leaves
2 lemon grass stalks
1 kaffir lime leaf (optional)

For Garnish:
3 tbsp of coriander, washed and chopped

Method (if using oil):

1. Heat oil, fry the Thai red curry paste till oil starts oozing from the sides. Then add all the veggies, mushroom, ginger, galangal and tomatoes. Sauté in the paste till all the vegetables are coated with it. This will take about 1 min of continuous sauteing.

2. Now add the coconut milk. Mix well.

3. Then, add the lemon grass extract and the vegetable stock. Add lemon grass stalks and salt as per taste.

4. Once this mixture is hot enough drop in the bouquet garni.

5. Let all the vegetables cook in this flavoured stock till tender and boil for 5 mins. Cover and cook.

6. Squeeze in some lemon juice and put it off heat.

7. Garnish with coriander. Serve hot.

Method ( without oil):

1. Heat the vegetable stock or water. bring it to a boil.

2. Add in the curry paste, coconut milk, lemon grass extract.Mix well.

3. Add in all the vegetables, ginger, galangal, mushrooms, tomatoes and lemon grass stalks. Season with salt and let it cook. Drop in the bouquet garni as well. Cover and cook.

4. It should be done in 10 mins, squeeze in the lemon juice and bring to a boil and its ready to serve!

Notes & Tips:

1. The curry paste is spicy so no other spices required. If you want it more spicy, add in another teaspoon of the paste and mix well.

2. My guests included kids, who were fussy about vegetables in soup. So after the soup was ready, I scooped out a handful of vegetables and blitzed the rest. I was very worried it will change the taste. But hey! it did not!! And it made it thicker... obviously!

But I would not recommend blitzing it as that's not how the soup is served!

3. You may add 2tsp of cornflour slurry while boiling if you want it thick.

4. The choice of vegetables & mushrooms is entirely upto your preference.I'd suggest cooking the veggies until almost done as residual heat will cook it further. Also, because overcooking is very common while making soups destroying the nutritional value!

5. If you can't decide, go with this mix:
Veggies: Babycorn, onions, tomatoes, lemongrass, carrots, cauliflower, cabbage, ginger
Mushrooms: Oyster, Button (either or both)

6. For Jains:
Its really simple, just omit the onions. No difference to taste. Proceed as it is. It tastes delicious without mushrooms also!

Let me know how it turned out! Please leave your experiences in the comments section. If you have any suggestions, ideas or made any changes to this recipe, I'd love to know!

Let it rain while you enjoy this delightful soup with your loved ones!
Friday, April 19, 2013

Vietnamese Curry & Basil Rice


I think I have a soft corner for South-East Asian (especially Chinese) and Italian food. My first experience with Vietnamese food was when my Vietnamese classmates made vegetarian Nems (Rice-paper Spring Rolls) amongst a few other things.Then, fried Nems at one of the house parties hosted by mom. And then, recently when my cousin who also likes cooking was talking about Vietnamese curry.. which really caught me and I started searching for it.
Obviously, most of the recipes I found were with meat or seafood. And tofu. I am not a great fan of tofu except for silken tofu in Japanese Miso Soup!
After several days of browsing, I finally made my version of this curry earlier this week.

Vietnamese Cuisine in many ways is similar to Thai. Though I feel Thai Cuisine is robust in terms of flavours and foods, whereas Vietnamese Cuisine is an emulation & adaptation of its neighbouring regions. Like Thailand, they use a lot of sea-food too. They are known for the dog meat delicacy that is served in festivals! And, of course their coffee. Decent I'd say!

Honestly, this curry is quite similar to the Yellow Thai Curry because it uses coconut milk as one of the main flavours. But, the vegetables and preparation I'd say is a lot less fussier than Thai Curry unless you stock curry paste. Besides this is a very good option for low fat meal because it is entirely optional to use oil!
Yes.. It tastes the same without oil!!
I served it with simple basil rice. Basil was subtle yet fragrant. I had it handy so I used it. It can be served plain.

You can use whatever vegetables suit your palate..! After all, what's the point in cooking up something if it doesn't have foods you like to eat!

So here it is:

Serves: 2 - 3. Preparation Time: 10 mins. Cooking Time: 15 - 20 mins.

Ingredients

For Vietnamese Curry:
½ cup red onion, diced (1 medium sized)
¼ cup tomato, diced (1 small)
½ cup carrots, sliced (1 small)
1 cup button mushrooms, quartered (6-7 mushrooms)
1 cup potatoes, diced (2 medium sized)
1 cup coloured belled peppers, diced (red, green, yellow)
1 heaping tbsp chopped ginger
1 heaping tbsp chopped garlic
1 cup coconut milk
2 - 3 cups water
1 tbsp cornflour
2 tbsp curry powder
1 bay leaf
1 tsp turmeric/haldi powder
1 tbsp red chilli powder
1 tsp sugar (optional)
½ cup lemon grass extract*
1 tbsp olive oil (optional)
salt as per taste

For Basil Rice:
1 cup rice (I used regular basmati, it goes well with other starchy rice, brown rice, thai rice)
2 cups water
1 tsp salt
3-4 basil leaves

Method:

For Curry:


1. Heat oil in a deep pot. Add bay leaf, onions, ginger & garlic. Sauté for 30 seconds.


2. Add mushrooms, capsicums and sauté for a minute.

3. Then add, tomatoes, potatoes & carrots. Add salt, 2 cups water, ¾ of coconut milk and lemon grass extract. (I also used lemon grass paste as a bouquet garni)
If not using oil, just add everything under steps 1, 2, & 3 and simmer.

4. Add curry powder, sugar, turmeric, red chilli powder.

5. Let this all simmer on low flame until all the vegetables are cooked. It will take about 10-15 mins.

6. Check for taste. The curry will be slightly watery so mix the cornflour in balance ¼ cup coconut milk, and add to the curry. It will thicken.

7. Put it off heat. Serve.  Yes its that simple!
Garnish with spring onion greens, mint or whatever is handy..!

* Take 3-5 stalks of lemon grass and ½ cup water and blend them into as smooth a purée as possible.
Strain it using a fine sieve. All that remains in the sieve, tie it into a bouquet-garni and drop in the curry till cooked. Squeeze and remove it once the curry is ready.

For Basil Rice:

1. Thoroughly wash the rice.
2.  Boil 2 cups water with salt.
3. Now add basil and the rice and let it cook for 10-15 minutes.

Notes & Tips:

1. If you do not have store bought curry powder handy, just mix in 1 tbsp of coriander-cumin seed/dhania-jeera powder with 2 tbsp sambhar masala. I did the same.

2. You can add broccoli and tofu. They lend a different flavour to the mix. Whatever vegetables you choose, do not omit tomatoes & potatoes.

3. For Jains:
  • If using oil, sauté bay leaf & ginger.
  • Add vegetables (bottle gourd, tomatoes, carrots (if using), peas, beans, bellpeppers, babaycorn, cabbage, etc), water, cocnut milk, lemongrass extract and spices.
  • Follow step 4 onwards.

Friday, March 1, 2013

Spinach & Mushroom Cannelloni


I have never made a cannelloni. Its been on my to-do list for a while now.
So I made it this week and it was really delicious! I never knew it would turn out so good!!
The best part is it is healthy and colourful! A meal in itself.. If you like lasagne you will undoubtedly like this.

Cannelloni is simply a thick tubular pasta with a filling inside and sauces outside. Alternatively, lasagne rolled like thick cigars/rolls with filling inside is the same as the ready made tubular ones! This is baked just like lasagne! Lasagne follows layering, these are rolls, rest remains the same!

So lets start with it!

Serves: 2 Preparation Time: 20 mins Cooking Time: 20 mins

Ingredients:

For the Creamy Cheese Sauce (1 cup):
1 heaped tbsp of butter
1 tbsp of maida/all purpose flour or sifted wheat flour
¾ cup milk
2-3 tbsp of fresh cream (store bought), I used Amul's
3 tbsp grated cheese, cheddar (preferably parmesan)
½ tsp ground nutmeg/jaiphal
salt & pepper as per taste

For the Rustic Tomato Sauce (1 cup):
2 tomatoes, blanched and puréed 
2 tbsp celery, finely chopped
3 tbsp carrots, finely chopped
2 tbsp garlic, finely chopped
3 tbsp onion, finely chopped
4-5 basil leaves, finely chopped
1 tbsp oregano
2 tbsp olive oil
salt and pepper as per taste

For the Spinach & Mushroom Filling:

1 cup spinach leaves (¾ bunch or 150 gms), washed, blanched & shredded
1 cup button mushrooms, sliced
2 tbsp garlic, finely chopped
1 tbsp olive oil
salt & pepper as per taste  

For the Cannelloni:

4 Lasagne sheets, home-made or store bought
4 cups water
2 tbsp oil
salt as per taste

For Garnish:

2 tbsp Mozzarella cheese, grated
1 tbsp finely chopped parsley

Method:

For the Cannelloni:


1. Take the water in a sufficiently deep and wide vessel and bring it to a boil. Once boiling, add 1 tbsp oil and enough salt. Then add in 4 lasagne sheets.


2. Follow the cooking instructions on the packet, usually 8-10 mins. Once cooked, immediately drain it and apply the balance 1 tbsp oil and leave aside.

For the Creamy Cheese Sauce:

1. Heat the butter in a pan. Once melted, add the sifted flour and cook for 30 -45 secs.


2. Now add the milk to this mixture IN 3 PARTS to avoid lumps while stirring continuously.

3. Once the milk has uniformly integrated with the flour and butter and thick, you can now add the cream, cheese,  salt, pepper and nutmeg.

4. Let this cook for about a minute and leave it aside.


You may preheat the oven at 200°C for 15 mins now.


For the Spinach & Mushroom Filling:

1. Chop the veggies and keep aside.


2. Heat the oil in a pan. Add the garlic and sauté for 45 secs. Mix in the blanched spinach and mushrooms. Stir well.


3. Add salt and pepper and let it cook. Mushrooms will start giving out water. Cook it until almost all the water is gone.


4. Now add about 3 tbsp of our creamy cheese sauce to this mixture and mix well.


5. Get it off heat and keep aside.


For the Rustic Tomato Sauce:

1. Chop the veggies and keep them ready.


2. Heat the olive oil in a pan. Once hot, add the garlic and onions. Sauté for 45 secs.

3. Now add in the carrots and celery. Let it cook for about 2 mins until soft.


4. Now add in the basil and tomato purée.Let it cook for 3 mins. Then proceed to adding oregano, salt and pepper. Cook for more 2 mins.


5. The colour of the sauce would have changed by now. Get it off heat and keep aside.


Assembling the Cannelloni:

Remember to preheat the oven at 200°C for 15 mins before you assemble.

1. Now in a baking dish, place a few basil leaves randomly (optional). Then spread a generous layer of the rustic tomato sauce.

2. Divide the filling into 4 equal portions. In a separate plate or a flat surface, place one lasagne sheet and place one portion of the filling at either end of the sheet. Carefully roll and place it on the sauce in the baking dish. Repeat with the remaining 3 lasagne sheets.


3. Once all have been placed, spread the remaining creamy cheese sauce covering the cannelloni. Sprinkle some grated mozzarella cheese and bake for 10 -12 mins at 180°C.


4. Once ready just sprinkle some chopped parsley and serve.


Enjoy!!

Notes & Tips:

1. For Jains:
  • The creamy cheese sauce remains as it is.
  • In the rustic tomato sauce, you may omit the onions and garlic. Celery and carrots too. Instead just add 1-2 bay leaf, tomato purée  basil (7-8) and 1 tbsp mix herbs (oregano, parsley, thyme, rosemary etc.) Let it boil for 3-5 mins and keep aside.
  • For the Spinach filling, instead of garlic add ½ tsp finely chopped ginger. You may substitute mushrooms for ¾ cup boiled corn kernels.
  • Proceed as it is!
2. Alternatively, spinach can be combined with cottage cheese or corn.

3. I boiled the lasagne in the same water that I used for blanching the spinach! 

4. The creamy cheese sauce is similar to our regular white sauce. We just add in the cheese and fresh cream to make it richer!

Leave your experiences in the comments section! I'd love to know how did you like it!